DIY Guide: Roof Replacement Part 3: Getting Ready to Lay Shingles

Once the old roof has been removed, the rest of the roof installation should go smoothly. Often, removing the old shingles, especially if the roof is dual-layered, can be the hardest part. There are several parts of installing shingles that can be tricky, so it is a good idea to seek assistance from someone experienced with installing shingles, but it is not rocket science either and is something that a handyman can teach himself.

Table of Contents

Tools Required

Measuring Tape and Chalk Line: Measuring is one of the most important and trickiest parts of installing a new roof. A chalk line is used as a base when installing the shingles, so they are installed in a straight line.

Staples and Slap-hammer Felt paper is layed between the shingles and roofing board, providing an extra layer of moisture protection. To temporarily hold the felt paper in place, it should be stapled down using a slap-hammer.

Nailgun and Hammer: Depending on the builder, either a hammer or nailgun will be used to install the new shingles. A traditional hammer is preferred, as there is less risk of improperly installing the shingles or nailing them too deep. However, it is much more time consuming, so most contractors today use a nail-gun. Home contractors that do use hand nailing will usually advertise this as a selling point of their home renovation business.

Ladders: A ladder is used to get onto and off of the roof. Since you will usually be carrying a lot of items up and down the ladder, it is a good idea to use a sturdy straight ladder, which can be leaned directly against the house, instead of an a-frame ladder.

Back to Top

Inspecting the Roof for Damage

You should already have most of your supplies, but before you begin installing new shingles, it is a good idea to inspect the old roof for any damage, as well as doing a final inspection to make sure any nails, staples, or other items have been removed.

Usually water damage is pretty obvious, both in the attic and certainly once the old roof is removed, by the discoloration of wood. However, it is still a good idea to walk the entire length of the roof, inspecting the wood and ensuring that it is not rotten or otherwise damaged.

One of the most common areas for water damage is around vents, chimneys, and where two different roof pitches meet, so you should pay extra attention around these areas.

If you found any issues with the roof, such as rotten wood, you should address this before installing shingles.

Back to Top

A Quick Word About Ridge-Vent

A roof must have proper ventilation, to prevent moisture and heat buildup, which is essential to maintaining your shingle’s lifespan.

Many older homes used ventilation fans or even wind-powered vents, to provide ventilation. However, most new homes now use ridge-vent, which is a special type of capping that is installed along the ridgeline of a home.

Typically, a small portion of the roof-peak is removed, with the plastic ridge-vent being placed ontop of exposed peak.

While the ridge-vent itself will be installed last, if you are going to install ridge-vent and need to cut the roof, it is a good idea to do this first.

Back to Top

A Word About Loading the Roof

One of the most difficult parts of installing a roof is carrying the 80 pound bags of shingles onto the roof.

Depending on the builder and the roof, the shingles are sometimes preloaded. You may be able to pay the delivery man a little extra to hoist the shingles onto the roof, although this is usually against company policy for the delivery driver. Many professional roofing contractors use a lift, to achive the same effect and avoid having to carry the shingle bundles onto the roof.

While pre-loading the roof with shingles can save time, it does present a few obstacles and requires some planning. For example, you will most likely have to move the shingles a few times, as you tear off the roof. You are also loading the roof down with a lot of weight, so you want to be sure the roof wood is in good condition and distribute the weight evenly across the rafters.

Back to Top

DIY Guide: Roof Replacement Part 2: Roof Demo

Installing a new roof is a very big project and, while not overly complicated, can be extremely strenuous. One of the biggest, and also most labor intensive parts, of a new roof installation is removing the old shingles. Even if you do not plan on doing the actual roof installation yourself, doing the demo can save you a big chunk of money and is not difficult at all, as long as you do not mind getting your hands dirty.

Table of Contents

Tools Required

Tear Off Tools: There are not many tools required to do the roof demo, with a sturdy tear-off tool, usually being the most important. A tear-off tool is a specially designed tool used to remove shingles. It has a triangle shaped head and long handle, allowing you to easily pry off shingles. Since it has teeth, it is easy to use it to remove nails and other debris.

While a shovel could also be used, and was commonly used in the past, it is better to go ahead and invest in a few tear off tools, one for each worker on the roof.

Dumpster: It is a good idea to rent a dumpster to put the old shingles in, as well as other materials you may need to discard. Most states have very strict rules when it comes to shingle disposal, as they are petroleum products. They can not be burned and usually can not be disposed of in city-convince style dumps. Instead, you usually need to take them to a landfill and using a trailer to haul them away can be time consuming and expensive.

Instead, renting a dumpster is usually the way to go, as most offer a standard fee for so many tons of debris and will pickup/drop off the dumpster. Dumpster placement is important, as you want it to be in a place where you can easily drop shingles into it from the roof. Of course, keep in mind that when fully loaded, a full size truck will need to be able to get in and out of your yard with it, so it should not be placed on or around soft ground.

Tarps: While not technically required, it is a good idea to place a tarp under the roof as you tear off shingles. Inevitably a lot of debris will fall off the roof and a lot of nails. By having a tarp down, you can keep many of these nails from falling in your yard.

You can use a smaller tarp and periodically move it, as you move along the roof. Also, if it rains during the tear off, a tarp can come in handy.

Ladder: You will also need a ladder to get onto and off of the roof, as well as carrying supplies up and down. While you could technically use an a-frame ladder, this is not recommended, as it is not as safe as a straight ladder, especially when carrying items or at the end of a long day.

There are of course a number of other tools you might end up using and chief among them is a good set of gloves. However, the above tools are the most common.

Back to Top

Removing the Old Roof

Once you have the tools assembled, you can begin tearing off the shingles. Using the tear-off tool, you can pry under the shingles, removing both nails and shingles. Depending on the condition of the old shingles, it is usually possible to take them off in somewhat large sections.

It is a good idea to to make an effort to place shingles directly in the dumpster, rather than just letting them fall off the roof. You will have a decent amount of cleaning up to do on the ground anyway, so each shingle you put directly in the dumpster is one less you have to pickup off the ground.

Initially, it is a good idea to simply get down to it, tearing off as much as possible in as big of pieces as possible. However, you will need to remove all nails, felt, and staples from the roof before you can start laying new shingles. Otherwise, you risk damaging the new shingles and creating water leaks. So, you will want to go over it several times to ensure that you did not miss any nails or other objects.

Some roofing contractors like to do the roof in sections, so will tear-off and install at the same time. If this is the case, it is important to plan out the demo, so you never end up carrying debris or walking along the new shingles.

After all the old shingles have been removed, including any nails, staples, felt paper, or other obstructions, you are ready to start installing your new roof.

Back to Top

Understanding Your Septic System

When you own a home, it is easy to feel like it is a money pit, as there is almost always things that need to be done, such as routine maintenance or renovations. However, in addition to helping improve the value of a home and reducing the risk of further damage, home repairs are also tax deductible. As a result, there are many advantages to doing both repairs and home improvements.

One type of regular home maintenance that is very important is taking care of your septic tank and drain lines. For those that live within city limits, this is usually not an issue, because the home will be on the city’s sewer system. However, those that live outside city limits will almost always use some sort of septic system.

Before we discuss septic system maintenance, it is important to take a look at how septic systems function.

Table of Contents

What is a Septic System?

Essentially, a septic system is like having a mini sewage treatment facility buried in your back yard. The system is self contained in that it does not connect to a larger sewage facility, like one owned by the local city. Often referred to as an On-Site Sewage Facility, or OSSF for short, septic systems are quite common in the United States and, for that matter, North Carolina, with approximately 75 Million Americans using some sort of OSSF in their home.

While most of the time a septic system will be found in rural areas, outside of city limits, there are some cities that allow homes to use septic systems. For example, in Indianapolis, which has a population of over 800,000, many neighborhoods within the city have septic systems.

When a city Annexes an area, which is a term for expanding and adding an area into the city limits, the homeowner is sometimes given an opportunity to keep their existing septic system indefinitely or for a period of time. Cary, North Carolina, is one example of a city that is oft expanding and annexing other areas, much to the chagrin of the affected parties, so it is possible that some homes within a city that has just been annexed will still use an On-Site Sewage Facility.

Back to Top

How do Septic Systems Work?

Generally, a septic system will consist of a large tank buried in the ground, as well as a drain field. The house’s sewage lines, which usually include lines running from the toilet in addition to gray water, such as that from the shower or sink, will flow into the septic tank.

The size and depth of the tank is determined by the size of the home, as well as local city ordinances and the number of restrooms in the house. Newer septic tanks are multi-chambered, while older ones may only be one chamber.

As waste and water enters the septic tank, solids settle to the bottom of the tank and scum floats. There are a number of bacterial and chemical reactions going on, which further break down the waste and solids. This includes an anaerobic reaction, which occurs when oxygen and other acceptors, such as sulfates and nitrates, are not present.

In multi-chamber septic tanks, waste water will flow into another chamber, allowing the impurities to be further filtered.

Eventually, waste water flows out of the tank and into the drain field. The drain field, which is also sometimes called a leach field or seepage field, consists of one or more specially designed pvc pipes that extends into the yard. The seepage pipes are typically burred in a trench that often has a sand or rock bottom and the pipes themselves have many openings allowing the waste water to flow, or seep, out.

As the water, which has had larger sediment separated in the tank, flows out of the septic tank and into the drain field, it is transferred to the ground, evaporating, feeding plants and trees, and seeping into the ground. Eventually, after being cleaned naturally by the soil, it will return to the local groundwater table.

Typically the septic system will rely on gravity to push the water out, but in some cases a pump or other type of suction system will be used.

The depth and length of the septic drain field varies, again often related to the size of the septic system and house, as well as city regulations. However, most are at least 75 feet in length. It is important to note, however, that the seepage field dose not need to be in a straight line, so can zigzag to save space.

When the septic system is working correctly, there will be no smell, nor any standing water in the yard, usually lasting well over 40 years.

Back to Top

Issues and Concerns When Using Septic Systems

One of the biggest issues with a septic system is that you can not simply dump waste down your sink or use a garbage disposal the same way you would when on a city sewage line. This is not just limited to cooking waste and food waste, but also things like tampons, which can clog the system. While doing so occasionally is not a very big issue, regularly putting food waste, including cooking oil, into the septic system can cause it to clog, as well as causing other difficulties.

Another concern is damage to the drain field. While the drain field, which typically consists of a line of pvc pipes buried in the ground, is several feet underground, it is still possible to disrupt it. The most common cause of these types of issues is by roots growing into and disrupting the pipes. However, you must also be careful when digging around the drain field.

Back to Top

Septic Tank Maintenance

As stated above, being conscious about what materials you put into your septic system is probably the single most important step in maintaining a healthy septic system. This includes avoiding dumping oil, food waste, tampons, and other objects into the OSSF.

Regularly having the sediment and solids removed from the septic tank is also very important. Failing to do so can significantly reduce the life of the septic system and drain field, as well as potentially backing up into the home.

There is no exact time frame of when a septic tank should be drained and it varies, depending on the size of the tank and the number of people in the home. It is typically a good idea to check it at maximum every three years, although again the rate of use and size of the system are factors.

Since the tank will be filled with sludge and other bio-hazards, it is important to contact a company that deals with septic tanks and systems. They will send a special truck that has a tank to hold the waste. The truck will pump it out of the septic tank and remove it to a waste facility. Cost will vary and it is a good idea to call around, but it will probably be a few hundred dollars.

Some people also use products like Rid-X in their septic system, which are powders flushed down the toilet that introduce special bacteria into the septic tank. The idea is that the bacteria will help break down the sludge and other solids. However, their effectiveness and benefit are often debated, with some claiming these sorts of products do more harm than good.

Back to Top

DIY Guide: Roof Replacement Part 1: Preparation

Installing a new roof or replacing an existing roof is often the biggest expense a homeowner will face, however the roof is also one of the most important parts of a home, with a leaky or improperly installed roof being very expensive and potentially affecting many other areas of the home.

When installing a new roof on your home, the first step should always be planning. It is important to determine what type and how many different supplies you need, as well as doing some comparison shopping to help find the best deal on shingles and other roofing materials.

Table of Contents

Determining the Square Footage of Your Roof

The total square footage of your roof is one of the most important measurements, as this is used to determine how many shingles you need to buy, as well as a number of other materials.

While you can certainly estimate the square footage, based on the width and length of your house, it is best to physically get on the roof and measure it. Depending on whether you have a ranch style home, front porch, or a more complicated roof layout, this may mean taking several measurements and then adding them together.

For those that do have a roof with multiple pitches or sections, it is a good idea to clearly label them on a note pad.

And, of course, as is always the case, it is important to measure twice and ensure that you come up with the same measurements both times!

For simplicity, we are going to use a ranch style home as an example in how to determine the roof’s square footage.

  1. First, starting at the top of the roof, measure down towards the ground in a straight line to determine the width of the roof.
  2. Next, measure along the ridge of the roof, longways, to determine the overall length of the roof
  3. By Multiplying the width obtained in #1 and the length obtained in #2, you can determine the square footage of one side of your roof.
  4. Finally, multiply the figure obtained in #3 by 2 to determine the total square footage of your roof.

*If your roof is not an a-frame or you have a porch or other shingled area, you may need to

Back to Top

Determining How Many Shingles You Need

Once you have the total square footage of your roof, you can use this figure to determine how many bundles of shingles you will need, but first you need to figure out how many squares your roof is.

Roofers divide a roof into squares, which are 10 foot by 10 foot sections of roof, using the number of squares as a starting point for their estimate. One square is 100 square feet of roof.

To determine how many squares your roof is, you can divide your total square footage by 100. So, a 3000 square foot roof would be 30 squares. Depending on the ability of the roofing contractor, it is possible to lay upwards of 8 to 10 squares per hour, although a homeowner will not likely be able to match this.

There are generally 3 bundles of shingles in a square, which is 100 square feet, although this can vary depending on the type of shingles you use. For example, three tab shingles are most often going to be 3 bundles to a square, while architectural shingles or slate shingles would likely be different.

To determine how many bundles of shingles you need, you can multiply the number of squares by the number of shingle bundles in a square.

Since 3 bundles per square is the most common, using the above example, you would need approximately 90 bundles of shingles for a 3000 square foot roof. Of course, you would also want to leave a few extra, both in case you mess up any while doing the roof and also so you have some left over later, in case you need to do a repair.

Back to Top

A Quick Word About Shingles

Shingles come in many different shapes, colors, materials, and sizes. Choosing the right type of shingle will often come down to personal preference and budget.

One important factor to take into account is the warranty provided on the shingles. Usually the shingles will be described as 30 year shingles or 20 year shingles, which means that they will be covered by a basic warranty for that long and should last accordingly. It is important, however, to keep in mind that they shingles must be installed correctly to obtain the warranty, so make sure to follow the manufacturer instructions during installation.

Shingles also come in lots, which means they were manufactured at the same time. Even though the shingle has the same color code, if it has a different lot number, it is likely that it will have a slightly different color. As a result, if you were to install shingles from two different lots, you might end up with a two-tone roof job, which is never desirable.

So, it is important to make sure that all your shingles come from the same lot, to ensure they have the same color.

Back to Top

Other Building Supplies Needed

While shingles are typically the most important and also most expensive part of a roof repair, there are also a number of other supplies and materials that will be needed.

If you are inexperienced with roofing, you will probably want to speak with a roof builder, to determine what you need, but the following list covers some common items that you will need.

  • Felt Paper: Felt is tar covered paper, which is placed directly next to the wood, in between the roof boards and shingles. It provides an added layer of protection between the wood, in the event that water is able to penetrate the shingles. Also, while doing the install, it provides weather proofing and can protect against a sudden downpour during the shingling process.
  • Staples: Staples are used to secure the felt in place, until the shingles can be added. A slap-hammer is typically used, as this provides a very quick and efficient way of stapling the felt paper down.
  • Roofing Nails: Nails are used to secure the shingles to the roof, as well as in a few other places, such as securing boot-caps for vents and ridge-vent. Depending on how the roof is installed, you will either need traditional roofing nails or nails for a nail-gun, often referred to as racks of nails. Hand nailing is very time consuming, but provides a better solution, while using a nail-gun is much more common and allows the roof to be installed much quicker.
  • Vents and Vent Boots: Most roofs have several vents, such as for the bathroom exhaust fans, clothes dryers, and kitchen oven fans. Often this is just a PVC pipe that sticks out of the roof, although this can vary. Vent Boots are rubber seals placed around pipes to prevent moisture from seeping in. You may also have several aluminum vents, which are rectangular and fit over a larger area.
  • Roofing Board: You may find, especially on older homes, that there is damage to the roof boards, so they may need to be replaced. You can often tell by looking in the attic, but this is not always the case.
  • Roof Fans or Ridge-Vent: Roofs also need to have adequate air flow, to prevent moisture and heat from building up in the attic. Fans were very common in the past and are still used today, but more and more homeowners are switching to ridge-vent, which is installed along the ridge-lines, allowing heat to escape from the roof. It is important to ensure that your home is up to code, so consult local building laws to determine the correct amount of ventilation required for your home.
  • Dumpster Rental: You will also need a dumpster for the old shingles, as shingles are very heavy, can not be burned, and can usually not be dumped in a convenience waste center. You could, of course, use a trailer to haul them away, but it is much easier to simply throw them off the roof into the dumpster.
  • Ladders: You will of course need a ladder sufficient for reaching your roof. While an a-frame ladder could be used, you will almost always want a straight ladder, which is safer, especially when carrying loads onto the roof.
  • Tarps: It is a good idea to place tarps on the ground under the roof. This way during demo, roof scraps are caught on the tarps and, more importantly, so are the roofing nails. This will help save your tires, as roofing nails stand up very easily and can be hard to pickup.
  • More: This is only a partial list and does not include tools and likely other items that you will need. As is usually the case, there will likely be other items needed, either because a problem is detected or to address other issues. It is a good idea to make sure you purchase items from somewhere that you can return them later if not used, as well airing on the side of caution and ordering a little extra, rather than not having enough.

Back to Top

Getting the Best Deal on Building Materials

Once you have a list of items that you need, you can begin comparison shopping. Most big-box stores, like Lowes or Home Depot, will provide a written estimate and allow you to build a shopping list, while also providing free delivery.

A good place to start is the building contractors desk, as they can usually get you quickly squared away with a basic list of items needed.

After you have an estimate, you can take it back and forth between the two stores to get the best possible deal. It is also a good idea to check other local building supply companies, using a similar method as above to find the best deal in your area.

Back to Top

DIY Guide: Roof Replacement

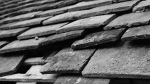
There are few expenses in the home greater than that of installing a new roof. However, fortunately, most shingles are designed to last for twenty to thirty years, often longer, so replacing your roof is not something that most homeowners will do very often. Like most home repairs, in regards to actual technical ability, roof repair and installation is not very difficult.

Of course with that said, there are certain aspects, like ridge-lines, vents, measuring, and overhangs that should not be done without experience or at least some understanding of the principals involved, but there are also many things a homeowner can do with little experience to help save money.

The following guide provides an overview for installing a new roof or replacing an existing one.

Roofing Repair Guide

  1. Part One: Preparation
  2. Part Two: Roof Demo
  3. Part Three: Getting Ready to Lay Shingles